Showing posts with label sewing my way. Show all posts

Mar 25, 2013

pillow cover, a bit different

I spent a fair amount of "me time" lately on this pillow cover. It is based on "Loonscape" by Charley Harper. It was quite a challenge to recreate the same feelings and illusions with my stash and my skills. Finally, the cover is all finished up and despite all those little imperfections I am pretty happy with it. 

Hopefully, my swap partner will like it as much as I do.

loonscape

finished size: 18" by 18"
fabrics: Kona Cotton solids, Umbrella Print trimmings
techniques: Paper Piecing und Needle Turn Applique
performance enhancing substances: lots of coffee


Sep 22, 2012

sleeping bag for teddy bears

sleeping bag 

One night when a fun and fast project was needed, I grabbed my batting scraps, cut into my stash and came up with a sleebing bag for J's teddy bear. Which now can't live without. Since it is really shy, the bag had to be modelled by our bunnies.


sleeping bag_2

Aug 27, 2012

feeling inspired

little ones_1 
 
yesterday evening I had the urge to create. something small and soft for my little ones. to play, to hold, to tell them their joys and sorrows before falling asleep or whatever else. 

 little ones_2

Jun 14, 2012

getting cover

cover_sewing 

This precious fabric scrap waited so long for just the right display. Guess I' ve found it. Combined with lots of beloved fabrics and the charcoal linen scraps that were leftover from another project.

cover_serger

Jun 5, 2012

nighty night

duvet_cover 

If only I would stop procrastinating and all the duvet covers done. There is a huge pile of fabric stripes waiting vor it. They will look fabulous and the best is, it's only from stash. Hooray for some stash busting.

duvet_cover_kids 
 duvet_cover_kids_M 

Meanwhile at least the munchkins have got some new summery covers. Time again to ponder about final layouts and possible distractions.

duvet_cover_ygb pillow

May 30, 2012

just can't keep it simple

pillow_1 

sometimes. When it was time to decide what to do with all my lovely Umbrella Print trimmings, I got a bit obsessed the last weeks by piecing an elephant and experimenting with different techniques on a small scale. That is something I have meant to do for a long time and never get around to it. So the bittersweet journey to this pillow cover began. Playing around with ideas, auditioning, reconsidering, sewing, appliquing, ripping apart and starting all over. Sometimes it felt like being in elemntary school when trying to remember embroidery stitches like the daisy stitch.

pillow_5 

The elephant and the mouse were paper pieced whereas the coati was appliqued (needleturn) using some softer trimmings. This little guy is just 2" high. Now, Let's talk about tiny. Somebody should stop me next time. The ruffled grass gives the needed perspective.

The words floating from the upper right corner tell the wondrous tale of the elephant meeting a coati. Therefore the wordstrips were quilted in lines that yould easily be seen as Chinese calligraphy. At the end I added some trees and a little feather to complete the scenery and a few handstitches. It was time to practise free motion quilting again.

pillow_3 

The panel finished at about 10" and got framed with the rest of my trimming package (the darker blue belonged to it as well). All that is left is dust and some tiny pieces. Not sure if they will get anything in the near future. Taking pictures was a bit different with the rainy days here and my little helpers. But nevertheless, it is finished and sits now in the reading nook of the munchkins where it belongs.

pillow_4

Here is a closer look on my trimming package I have used and let me tell you get quite a lot out of it.

trimmings

Oct 17, 2011

to snuggle

to snuggle

Little M loves music - dancing and giggling and everything - and he loves to snuggle. So cute! The Snuggle Softies pattern seemed just perfect to make him a little softie with a music box inside. Wonderful clear instruction, it was a breeze to sew. The music box is sewn into the belly and is waterproof enough to hand wash the softie. I picked several velours and some jersey knit from my stash, which felt the cuddliest. The brownish grey and the orange snout where picked first and the blues made for a wonderful contrast. The scarf as suggested by the pattern with its orangeand brown is just the perfect finishing touch.

Guess which little boy was pretty pleased to say the least :) Me too. I was a fun project plus I can check one more item of my long to do list.

Aug 28, 2011

proof that I might be a nerd (or just another pillow)

Over the last weeks I pieced together some scraps that were laying around while the kids were playing in my sewing corner. Slow and steady a cuddly pillow was growing.  The front is made of cordury, jersey, nicky and some terry cloth. To make it even more comfy it has some medium loft batting. The back is just plain without quilting and has a covered zipper as closure.

pillow 

The quilting started with some machine stippling on the cordury and some pebbles on the terry cloth. Still need to practice my free motion quilting. I went a bit crazy and added some houses with flags and a kind of giraffe-dino. The jersey was to stretchy for machine quilting on this lofty batting. Thus, some hand quilting was in order. So more houses, and of course a car ... and hopefully something like a simplified traffic light.

   pillow_car

 Oh ... and the proof ... there is no better place than home ;)

  me, a nerd

Aug 1, 2011

the promised bag post

I still owe you a post about the Sophia Carry All bag pattern, if I remember correctly. Well, here it comes.

bag_2

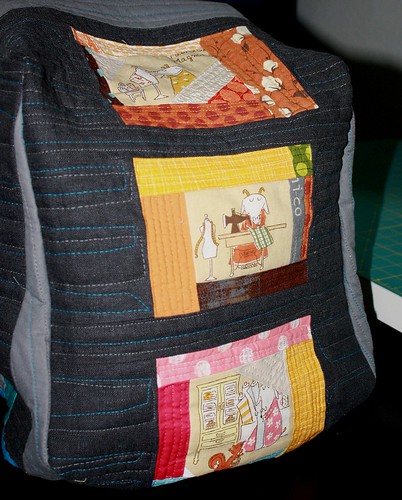
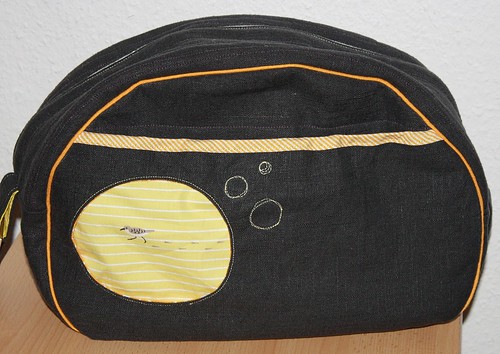
As it was for a swap, I actually did two versions of the bag. One following mainly the instructions to check if it will have the right size and look for my partner and just for some practice. Never used real piping before. The first bag is the one seen here. The outside is an AMH home dec which was easy to stabilize with some low-loft, iron-on batting.The only alteration was an additional big pocket on the outside.

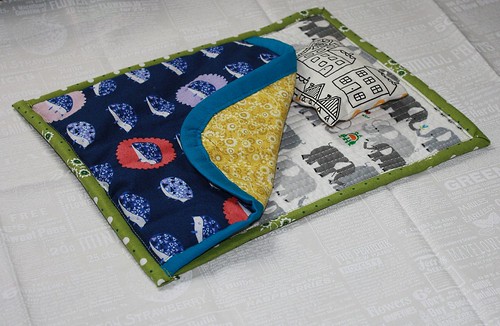
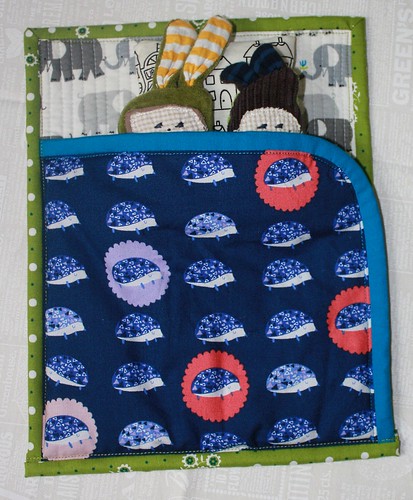
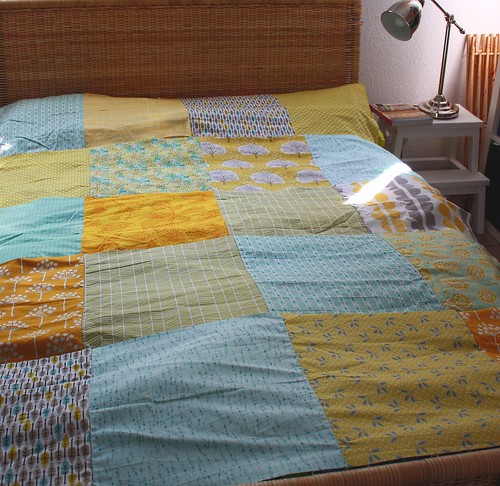
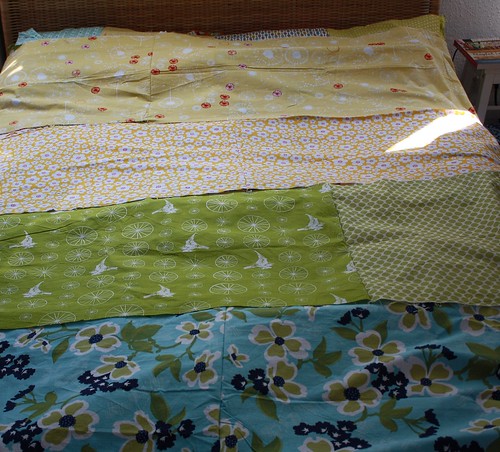
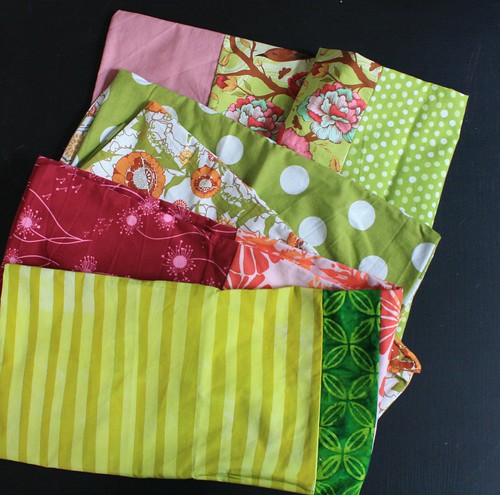
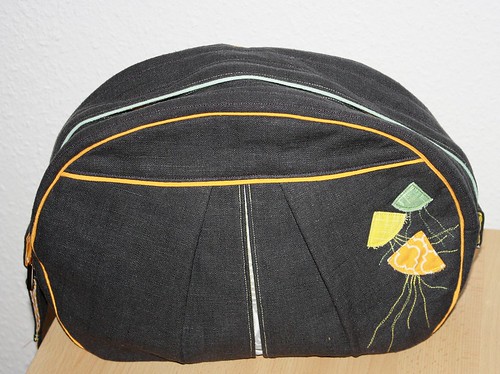
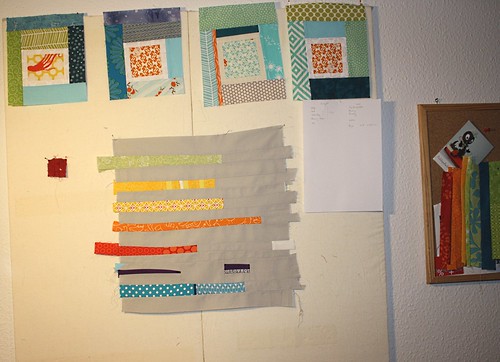
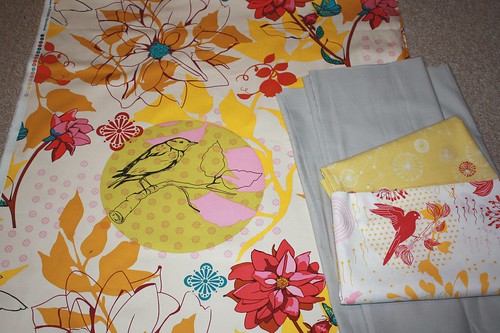
For the second version a bit of stash shopping was in order. I dearly miss all my trusty fabric shops back in Munich! Nevertheless, my stash is happy to get actually used LOL and there were some nice fabrics for my partner. Grey and yellow was one of here color combinations, so I picked a grey linen/cotton and added mainly yellows. This version did get a little pocket with a sandpiper peeping throuhg that is integrated in the additional outer pocket. I added some pleats - a project on itself - on the other side and changed the handles for one shoulder strap. Oh, and I almost forgot: the zipper is covered which looks just great.

The linen did get some more stabilizer, still it wasn't enough. It did look like a ugly plop of fabric after sewn together for some happy nights with my seam ripper. Oh my, there went the schedule. It still looked crap with more stabilizer. Finally, the linen was backed with some home dec and luckily my machine got through all the layers which were at times more then ten. It took so long to fix it and there was no way to get enough fabric in time for a fresh start. Hence, no time for a proper photo shooting. Still it was a lot of fun to see it all come together.

Here are my mental notes of the project:

  • Nice bag that is big enough for the normal stuff carried around and a bit more. And pretty versatile depending on the fabric used. Easy adjustable, too.
  • The project is suitable for anybody that is not afraid of sewing a zipper and some piping (even if it is the first time). You only should take your time and know how to sew straight or with consistent seam allowances.
  • Next time making the shoulder strapes, they will be 4-8" longer. Well, they are actually long enough but I don't like the tight fit.
  • Lazy as I am, I bought some piping. Works like a charm and saved me lots of my night time.
  • Any fabric needs to get heavily stabilized if not a home dec fabric.
  • The covered zipper looked great, so it will probably be my go to. The cover is about 1" wide and the pattern can be easily altered to integrate it . You only have to be carefull with the batting and stabilizer for the cover part.Otherwise the fabric might be difficult to handle.
  • Lots of topstitching. Still could be more.
  • You definitely should follow the lining instructions especially how to connect the outside and inside at the side seams!
    Someday, I might try to get the bottom stiffer and try out some nice little feet.
  • Drink more coffee when sewing around midnight (or less for breaking the addiction HAHA).
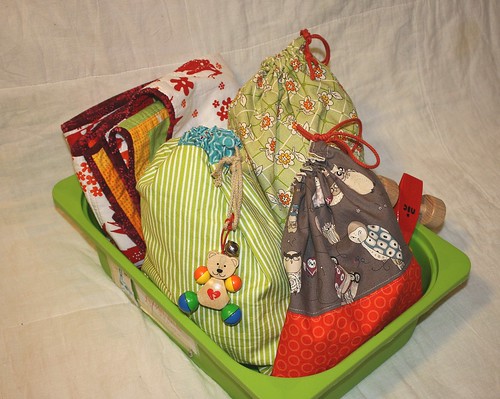
Next bag project will be a shoe bag, lingerie bag and all the stuff to get into a new travel bag. That is, when I finally get around to sew it. Still need some hardware and to figure out the pattern or to get a nice one. More time would also come in handy.

If anybody wanna try, I might be willing to swap pattern (or try me.)

bag_3

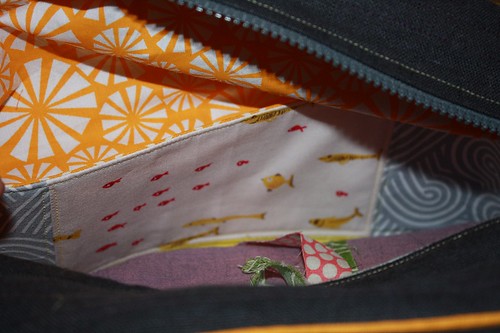
 Love the fishes on the inner pocket and all the sunny yellow :)


bag_4


Apr 4, 2011

Finally using my serger

For quite a long time I refused to get a serger since I was thinking it is quite some money for more or less one stitch that you can not even use for every project. Never have been sure if there is actual the need for it. On the other hand, it was rather time consuming, tedious and often frustrating to finish all seam allowances especially for jersey. I enjoyed making my kids some t-shirts but it definitely was an issue I've got more and more upset about. Thus, a serger it was. Until recently only used for some straight seams and easy fabric, I finally got myself to sew some of the t-shirts that where cutted month ago. Figured there was no need to fear them as they were supposed to get pj's or dumped depending on how bad things go.

owl t-shirt_2

The pattern is raglan t-shirt by ottobre using some blue owl jersey and some blue jersey for the sleeves. Every seam was basted as I was horrified by the possibility a needle could get between the knifes and I didn't dare to serge without needles nor basting. As everything came together pretty well it was worth the bit extra time. Neck and sleeves were finished with a  purple knit (a bit thicker than jersey similar to that part of sweaters around the wrist - no clue how you call this type of fabric in English. Darn!) which makes for a nice interesting, more sophisticating look. Of course J was only concentrating on the owl sticker LOL

owl t-shirt_3

  • Most important: As usual there is nothing to fear about. I am only cursing myself when I have to dump a project. Next time it will be done better.
  • Basting helped a lot to focus on serging and keeping my seam allowance fairly regular.
  • Tension was good, though it can be slightly improved and the seam looked good as well (no strange loops hanging everywhere)
  • Crossings with several layers of fabric are the main problem for accurate sewing as it tends to slow down the fabric transport and to shift the fabric.
  • Testing some different materials and techniques for neckline etc. (my sons are my best guinea pigs) to get a feeling what works and looks best in combination with a serger.
  • The seam allowance does look better and it was way more fun and relaxing then before.
  • Still not sure if my twin needle ever will be loved as there are some tension issues to resolve.
  • Already love my serger: no fuddling, silent and nice seams.
  • Why the heck didn't I had a server for making my sons bed linen?

owl t-shirt_1

Unfortunately, we still need some new pj's as this one has to be worn regularly.

Mar 19, 2011

WIPs

wips_031911

Some of my current WIPs out on my design wall (opposed to all my other WIPs stored in all those bins). The {love} letter had to be set aside as I am still waiting for the batting to arrive which seems to be on backorder. Too bad. Messes up my plans. But well, I could move on to some other things of my to-do-list.

I am improvising a bit for make mine modern. Same stupid thing, fabric still somewhere on its way. I like my wonky stripes on the grey but it still needs something to make it special. Have to think about it and see how my partner might like it.

My weirdest ideas come shortly before midnight and some speedy cutted scraps became a crappy star which would finish at 1". How the hell do you deal with those seam allowances. It gets all bulky no matter how they are pressed and it is rather difficult to press the block flat without distorting the fabric. Oh my, more midnight exercises to go.

tiny

Glad I have some of my recreation projects which are without any deadline or specific purpose. Just for the fun of it. As the log cabins for {under the sea}. Lots of greens, blues and bits of orange.

On the other hand this weekend will be challenging sewing wise. My sisters birthday wish was a cordury overall and today she comes for fitting the pattern. Furthermore, I am already changing the parts of the pattern which I do not favor. Never did any adult clothes except of some easy skirts and could get a bit nervous about it. Just a little.

Mar 1, 2011

giveaway - get it while it hoots!

giveaway - critter

Finally there is time for the little giveaway I am planning already for some weeks. Finding a new flat has proven to be quite time consuming and it's a big relief to have signed the contract. Now it is all happy planning (I want colors!) and in six weeks packing and moving. Most work will be to move and adapt our kitchen and to paint the old flat (over here, you usually have to paint your flat when moving). ehm, I am drifting away. What were we talking about? Right, a giveaway. If you like, you can win some of the softies I created together with little big J (aka my 2,5 yrs son). He already owns three of them and loves them to death. Quite to my surprise as he normally spends few minutes with any softy. Right now, there is definitely no space in his bed for more of them. Why we have so many softies anyway, you ask?

giveaway - pink owl

Well, once upon time little big J desparately wanted to get an owl made for a baby shower. Insistent as he was his mum offered to make an owl together for him instead. He would cut out a lot of owl shapes for the front and would receive a box of fabric and could choose which fabric to use for which owl. Time to time the would choose, sew, pin and cut together while the ironing and some fuzzy work was magically down over night. Stuffing was totally exciting and there was barely time to close for the last finishing stitches. Actually, the whole owl thing is quite fitting since a stuffed felt owl is one of my first sewing projects I can remember (someday back in elementary school).Well, his fabric box was big and full and the number of the cutted owl shapes endless so more and more owls were growing steadily...searching for a new place to live.

giveaway - blue owls

That is where you come in! We are looking for wonderful new homes for some owls and one little creature, where they will be loved and cuddled and everything. Each owl is made of cordury, quality quilting fabric and some bits jersey and nicky. For the little creature we repurposed a scrap of home dec which is as old as I am and that was sleeping in my scrap bin for quite some time. All are stuffed lightly using polyester stuffing. They are freshly washed - ready for cuddling or biting - which is what would happen here with them. They will all travel in fashionable coordinating bags inspired by some wonderful hobo bags I've seen online and can't find to link them *grr* though I've been to lazy to look for any instructions. Put in some diapers, changing clothes, toys and the like and you are ready to go whenever you want. Best of all, you can choose which side to wear outside according to your color mood.

giveaway - little owl

For a chance to win one of our softies, leave me a comment. You only have to promise to spend some time creating/painting/reading with your kids/grandchildren/... when you win or at least to smile the whole day.
  • For an additionally entry leave me a second comment with some name suggestions. Best names will a further chance to win.
  • You can blog about it (I would love you to) as we could need any help to find some nice places for those sweeties. Without further entries, though.
The giveaway will be open until March 12th (here and on my German blog). Please make sure that I have a possibility to contact you (profile or comment), otherwise you can't win. Winners will be chosen randomly.

giveaway - bags

Feb 15, 2011

sewing a {love} letter

love letter

Anyone seeing how this work title came to mind? Or is it just me? Anyway, this is the scrap quilt I was working on lately and finished yesterday. It started innocently enough with sewing most of my scraps together some month ago (yes, these are most of my scraps) and eventually adding some grey sashing. My first ideas were for a small quilt - up to lap size. However, everything looked to cramped and needed more space ... and then it kept growing and growing ... never made anything that big.

It looks gorgeous to have a pile of bright, pieced fabric. Still don't know how to quilt this little monster. May normal batting is a mid volume and I am not sure, if this sandwich bulk would fit under my sewing machine.

Sewing in such a liberate way takes much longer than expected but it was fun :) I will have to work on my techniques and the design process (e.g. I should have placed the grey and white differently). The seam allowance looks a bit ugly as I often used a scissor for roughly fitting my blocks, have to work on this as well. The big plan is to finish it before we move. Hope I can make it.

  • 1 night piecing the back
  • 1 night ironing and squaring front and back
  • 1 night sandwiching
  • about 3 nights for quilting plus 1 for pondering how to do
  • about 2 nights making and attaching binding
  • 2-3 nights stitching the binding down

Oh, what a project. You should have stopped me! Really!

The quilt is also a love letter on a less literal way. This year I rediscovered the love to my fabric stash. I felt so down sometimes last year that I sometimes forgot about it. And crafting just for its own sake without deadlines, bigger plans and so on. Love it! This big quilt will be so *squeeeeak*

Feb 10, 2011

new pillow for hubby

Hubby likes colors. Sadly as it is, our couch is more of a charcoal one for practical reasons. Two toddlers (which btw claim all nice colorful pillows theirs) require compromises like this. A while ago, musing what to do with my scraps, I started to cut them in triangles, adding more aqua, orange and bits of similar colors along the way. It took me some time to decide on the layout ... and to sew it together. Did I tell you that I am a rather slow girl. Forgetting all the time when crafting.

kissen_1

umm, where were we? ah yes, the pillow. We had an inlet of 30 x 60 cm, for which the layout was designed. For my first triangles the points match quite well despite the minimal squaring up(Didn't thought about it beforehand *blush*). The cover got a snuggly, orange nicky for the back as well as an envelope closure. The edges where finished with some Amy Butler dots.

kissen_2

Hubby loves it and defends it well :) But oh the shame, I totally forgot to quilt it as planned (nobody cares but me). Now I know why it was somehow finished faster than expected.

Feb 3, 2011

breaking my fabric diet

Currently I am trying not to buy any fabric except for swaps or to finish some WIPs at least until the end of February. This would give me some time to organize my stash. Big plan being to minimize the whole stash to an - still ambitious - amount I might use within one year (plus some basics and favorites). Of course the stash itself should not grow again. A girl has to dream, right?

scrap quilt - the beginning
It's all the fault of this one! Plus proof that a bigger design wall is needed - will still have to wait a bit.

So, to make a long story short. I continued to play around with some scraps as started last year. Kona Ash might or might not play a role in this project and the experiment might or might not become at least a good sized lap quilt. For which the grey will not be enough and most of my other solids will not fit to my vision of this quilt. My LQS didn't have it. Several online shops run out as well and when I finally found some I was frustrated enough to buy a lot more fabrics than intended (I had an eye on them already for a long time, so it isn't technically an impulsive purchase, or?) Curious, what everybody does with MY grey.

Aren't my new treasures pretty?

breaking my fabric diet

Jan 26, 2011

white and grey

... and log cabin of some sort. I loved Alexias request for Bee Modern Too. Much room for playing. Thus, I made too many blocks - four to be precise - while I was experimenting with value.

white-n-grey

Care for my thoughts while constructing them? Tell me, if it bores you to death.

Top right: It all started with the white piece (having little white flowers on it) and the letters. I decided to frame it in charcoal, which makes for a great contrast without being harsh. Next round was supposed to be bright again and to soften the it a bit I added the grey dandelions. The blocks has now a focus on the left side so I thought to emphasize it and add some tiny dandelion with the last stripe.

Bottom right: As the grey text and the charcoal fit quite nicely, I pieced a stripe and framed it white for showing it off. I wanted to add some Hope Valey, so this was the next round. On the other side, a whole round might easily look boring. Hence, the charcoal stripe that also mirrors the long center. Next round some white again and some grey dandelions for fun. I inserted the white into the dandelions to create a connection of the white and grey of the outer frame.

The construction of the other two blocks went similar except that I tried for the top block to fit in a stripe of all my tiny leftovers pieced together and for the lower on to fmatch some lines to create some sort of intersection.